Updated: Oct 23, 2025—8 min read
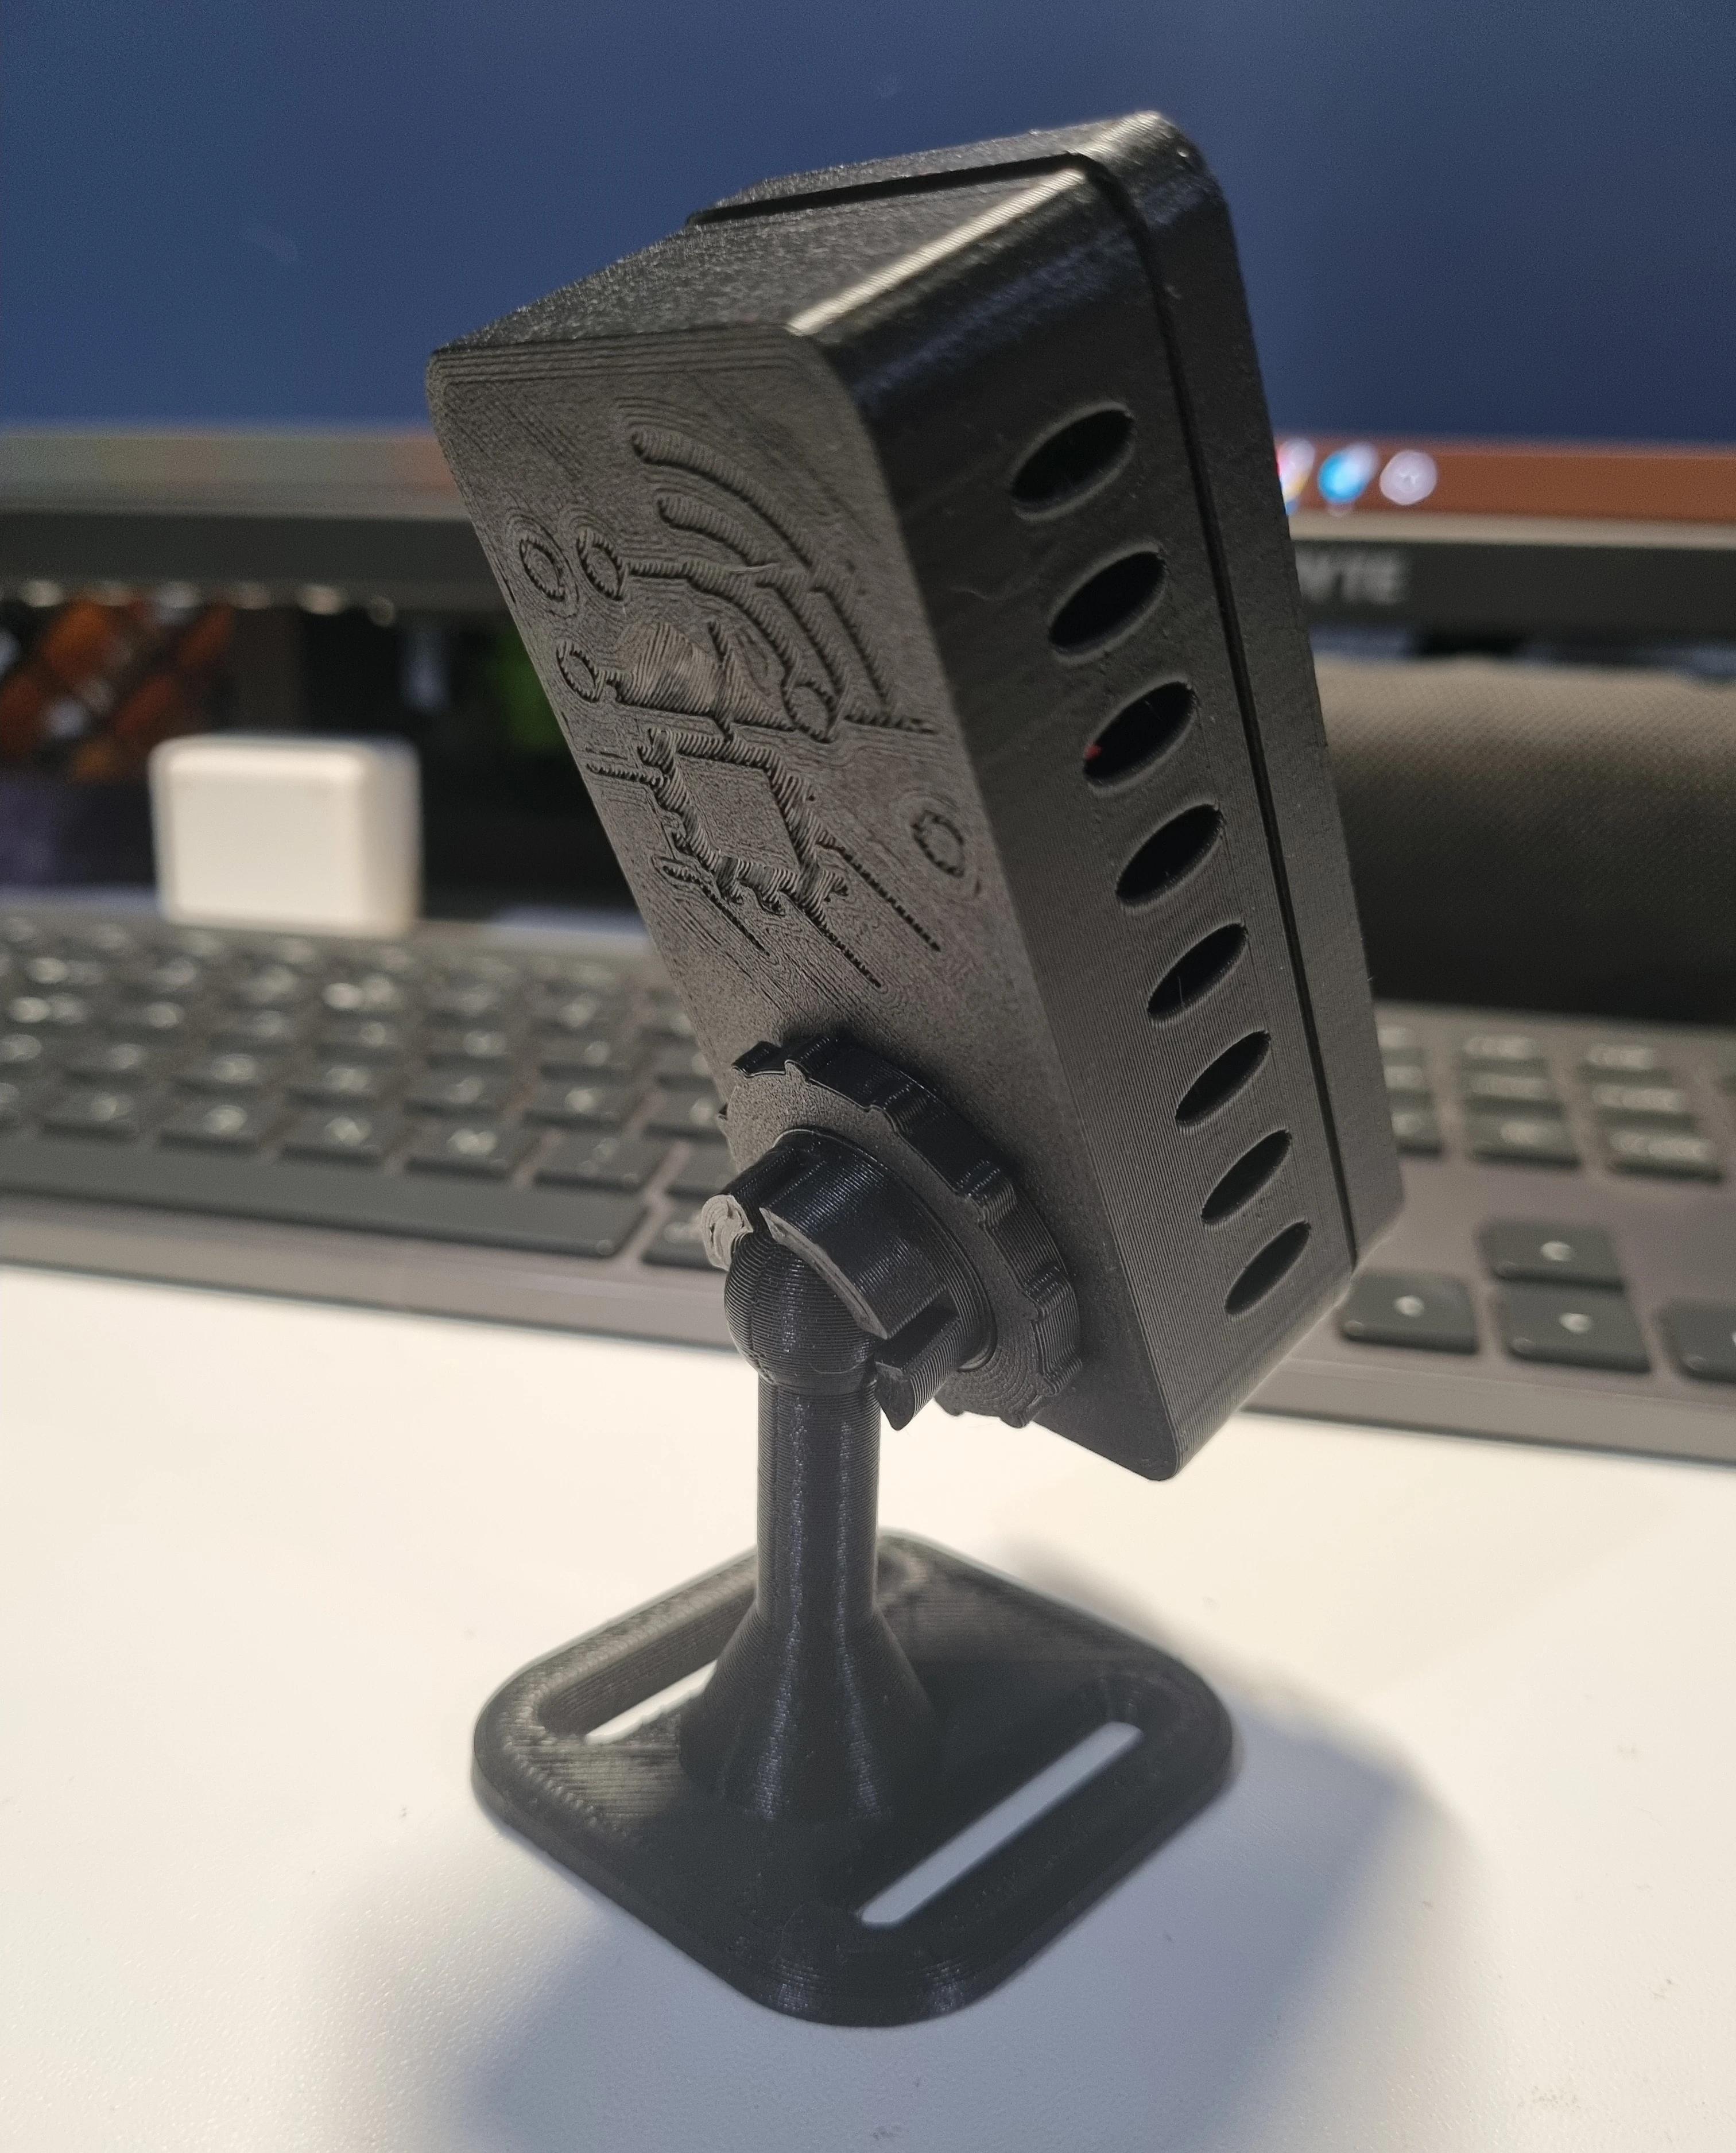
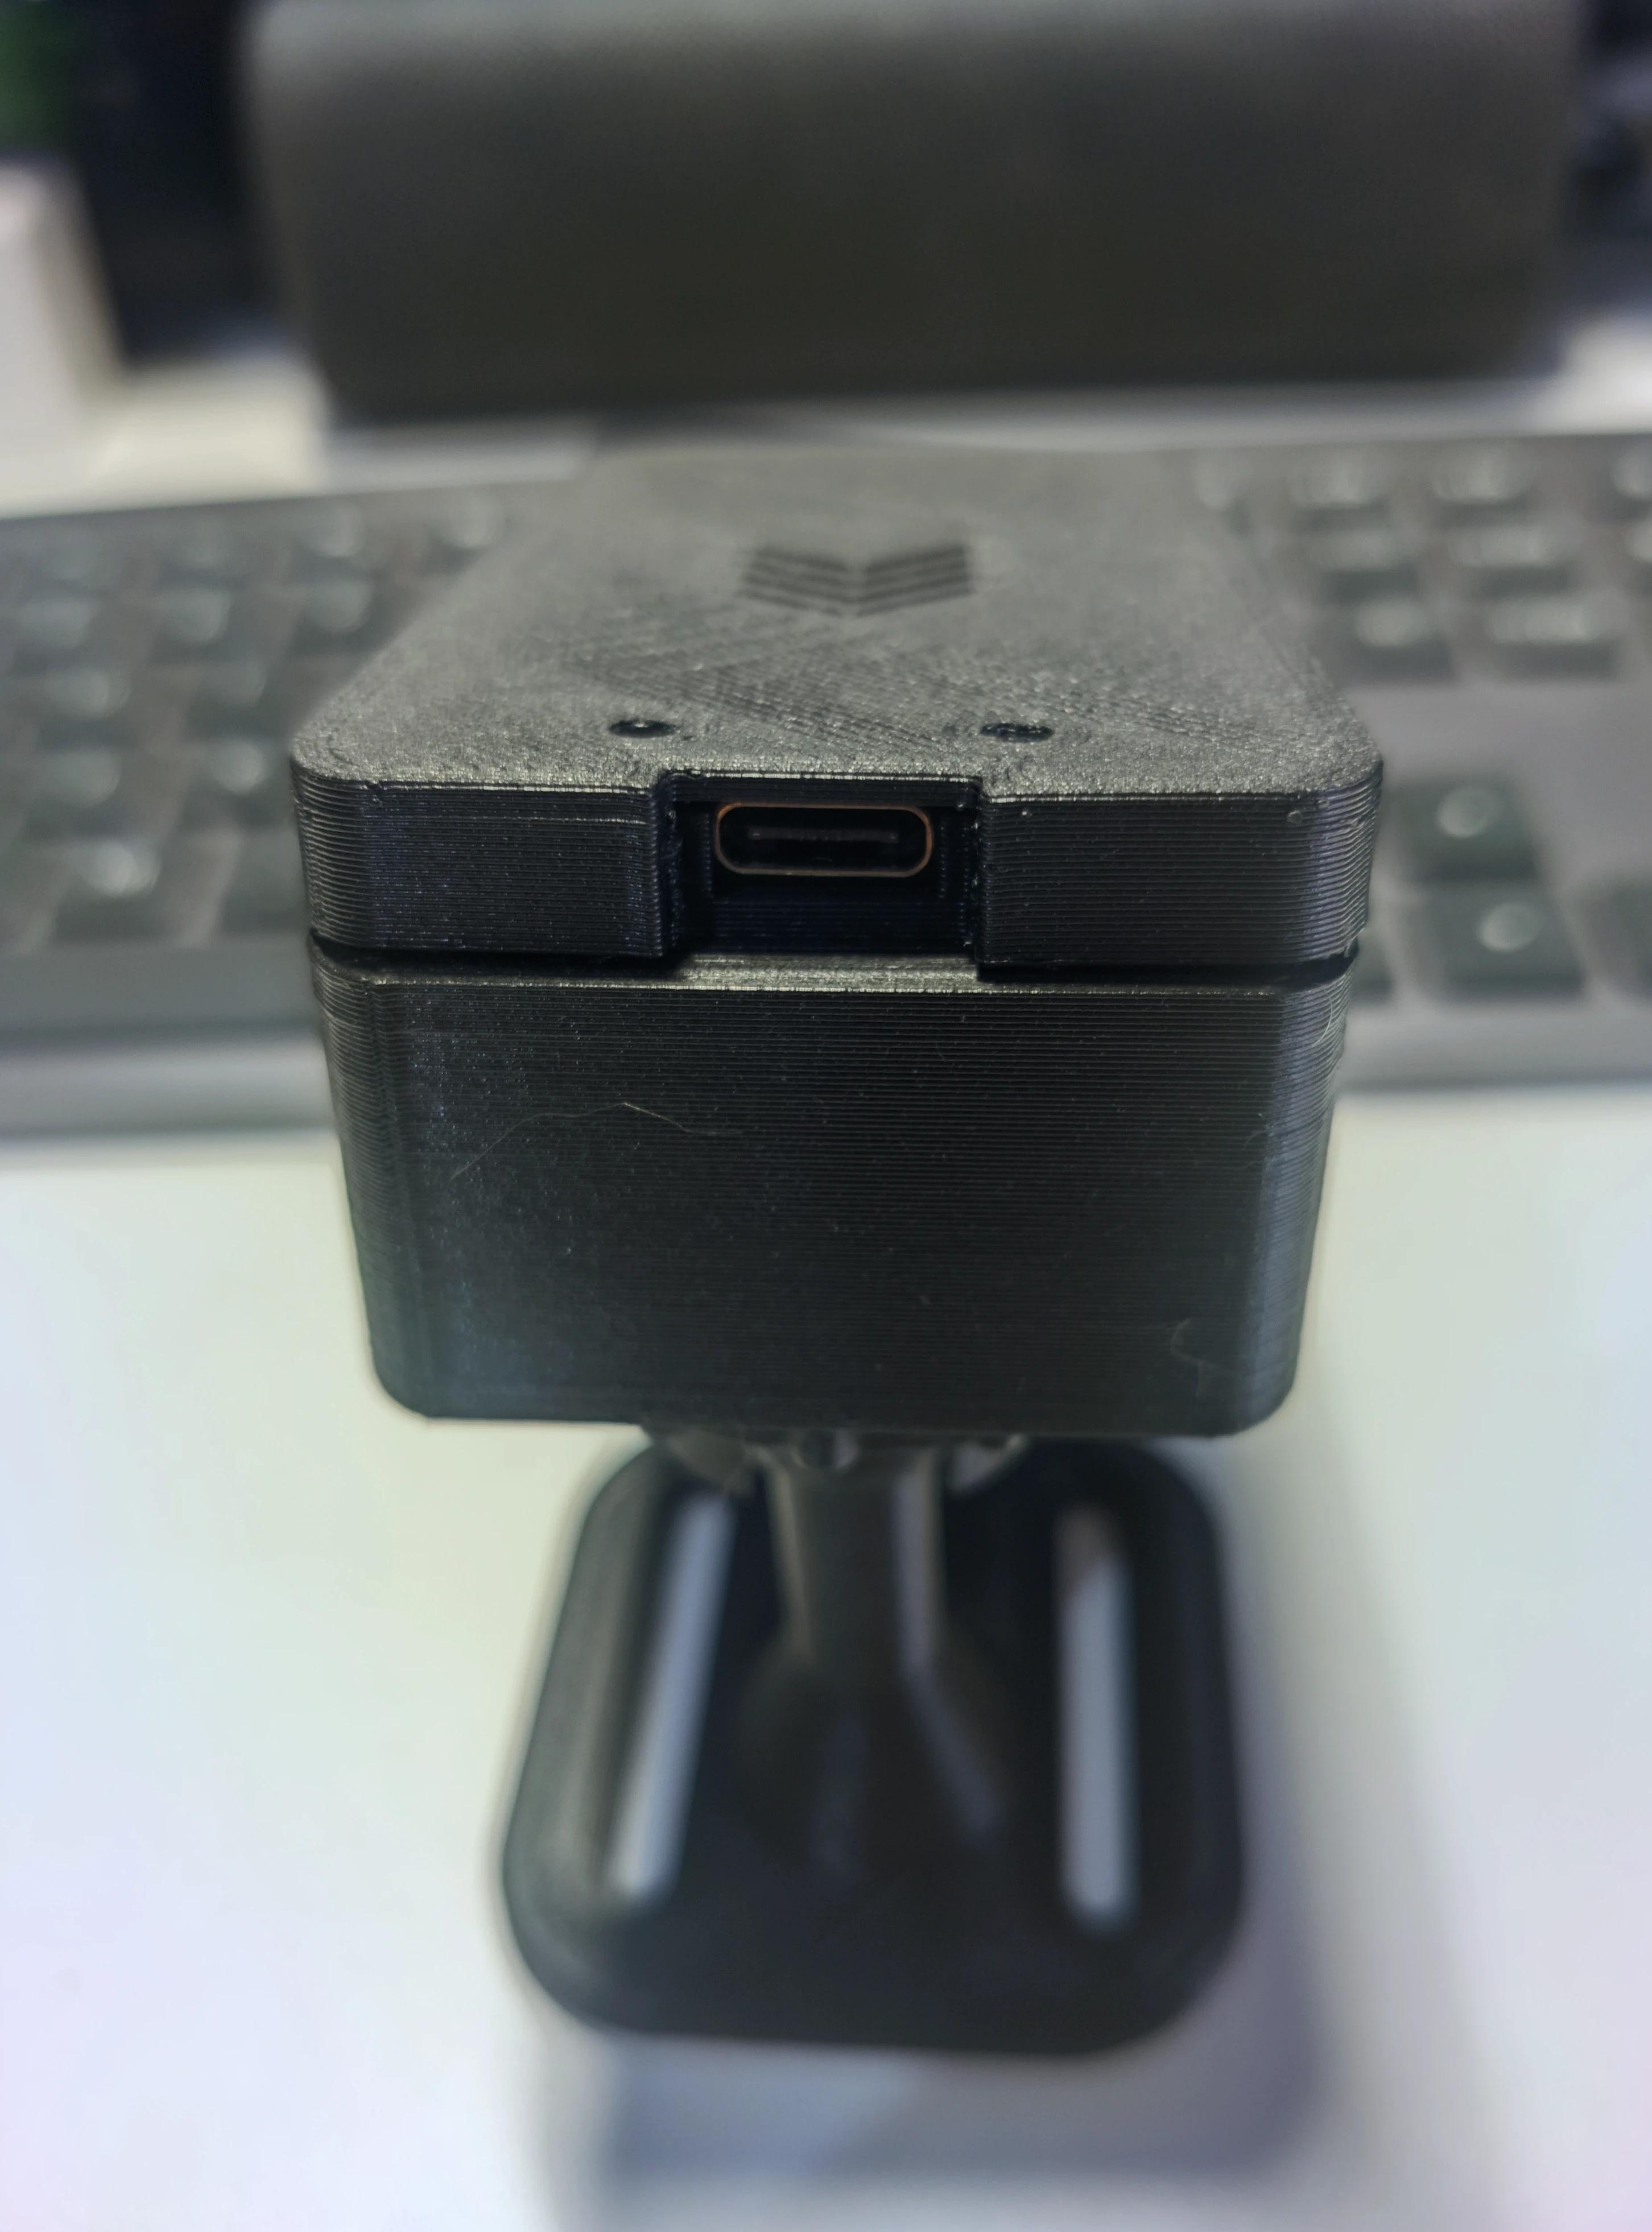
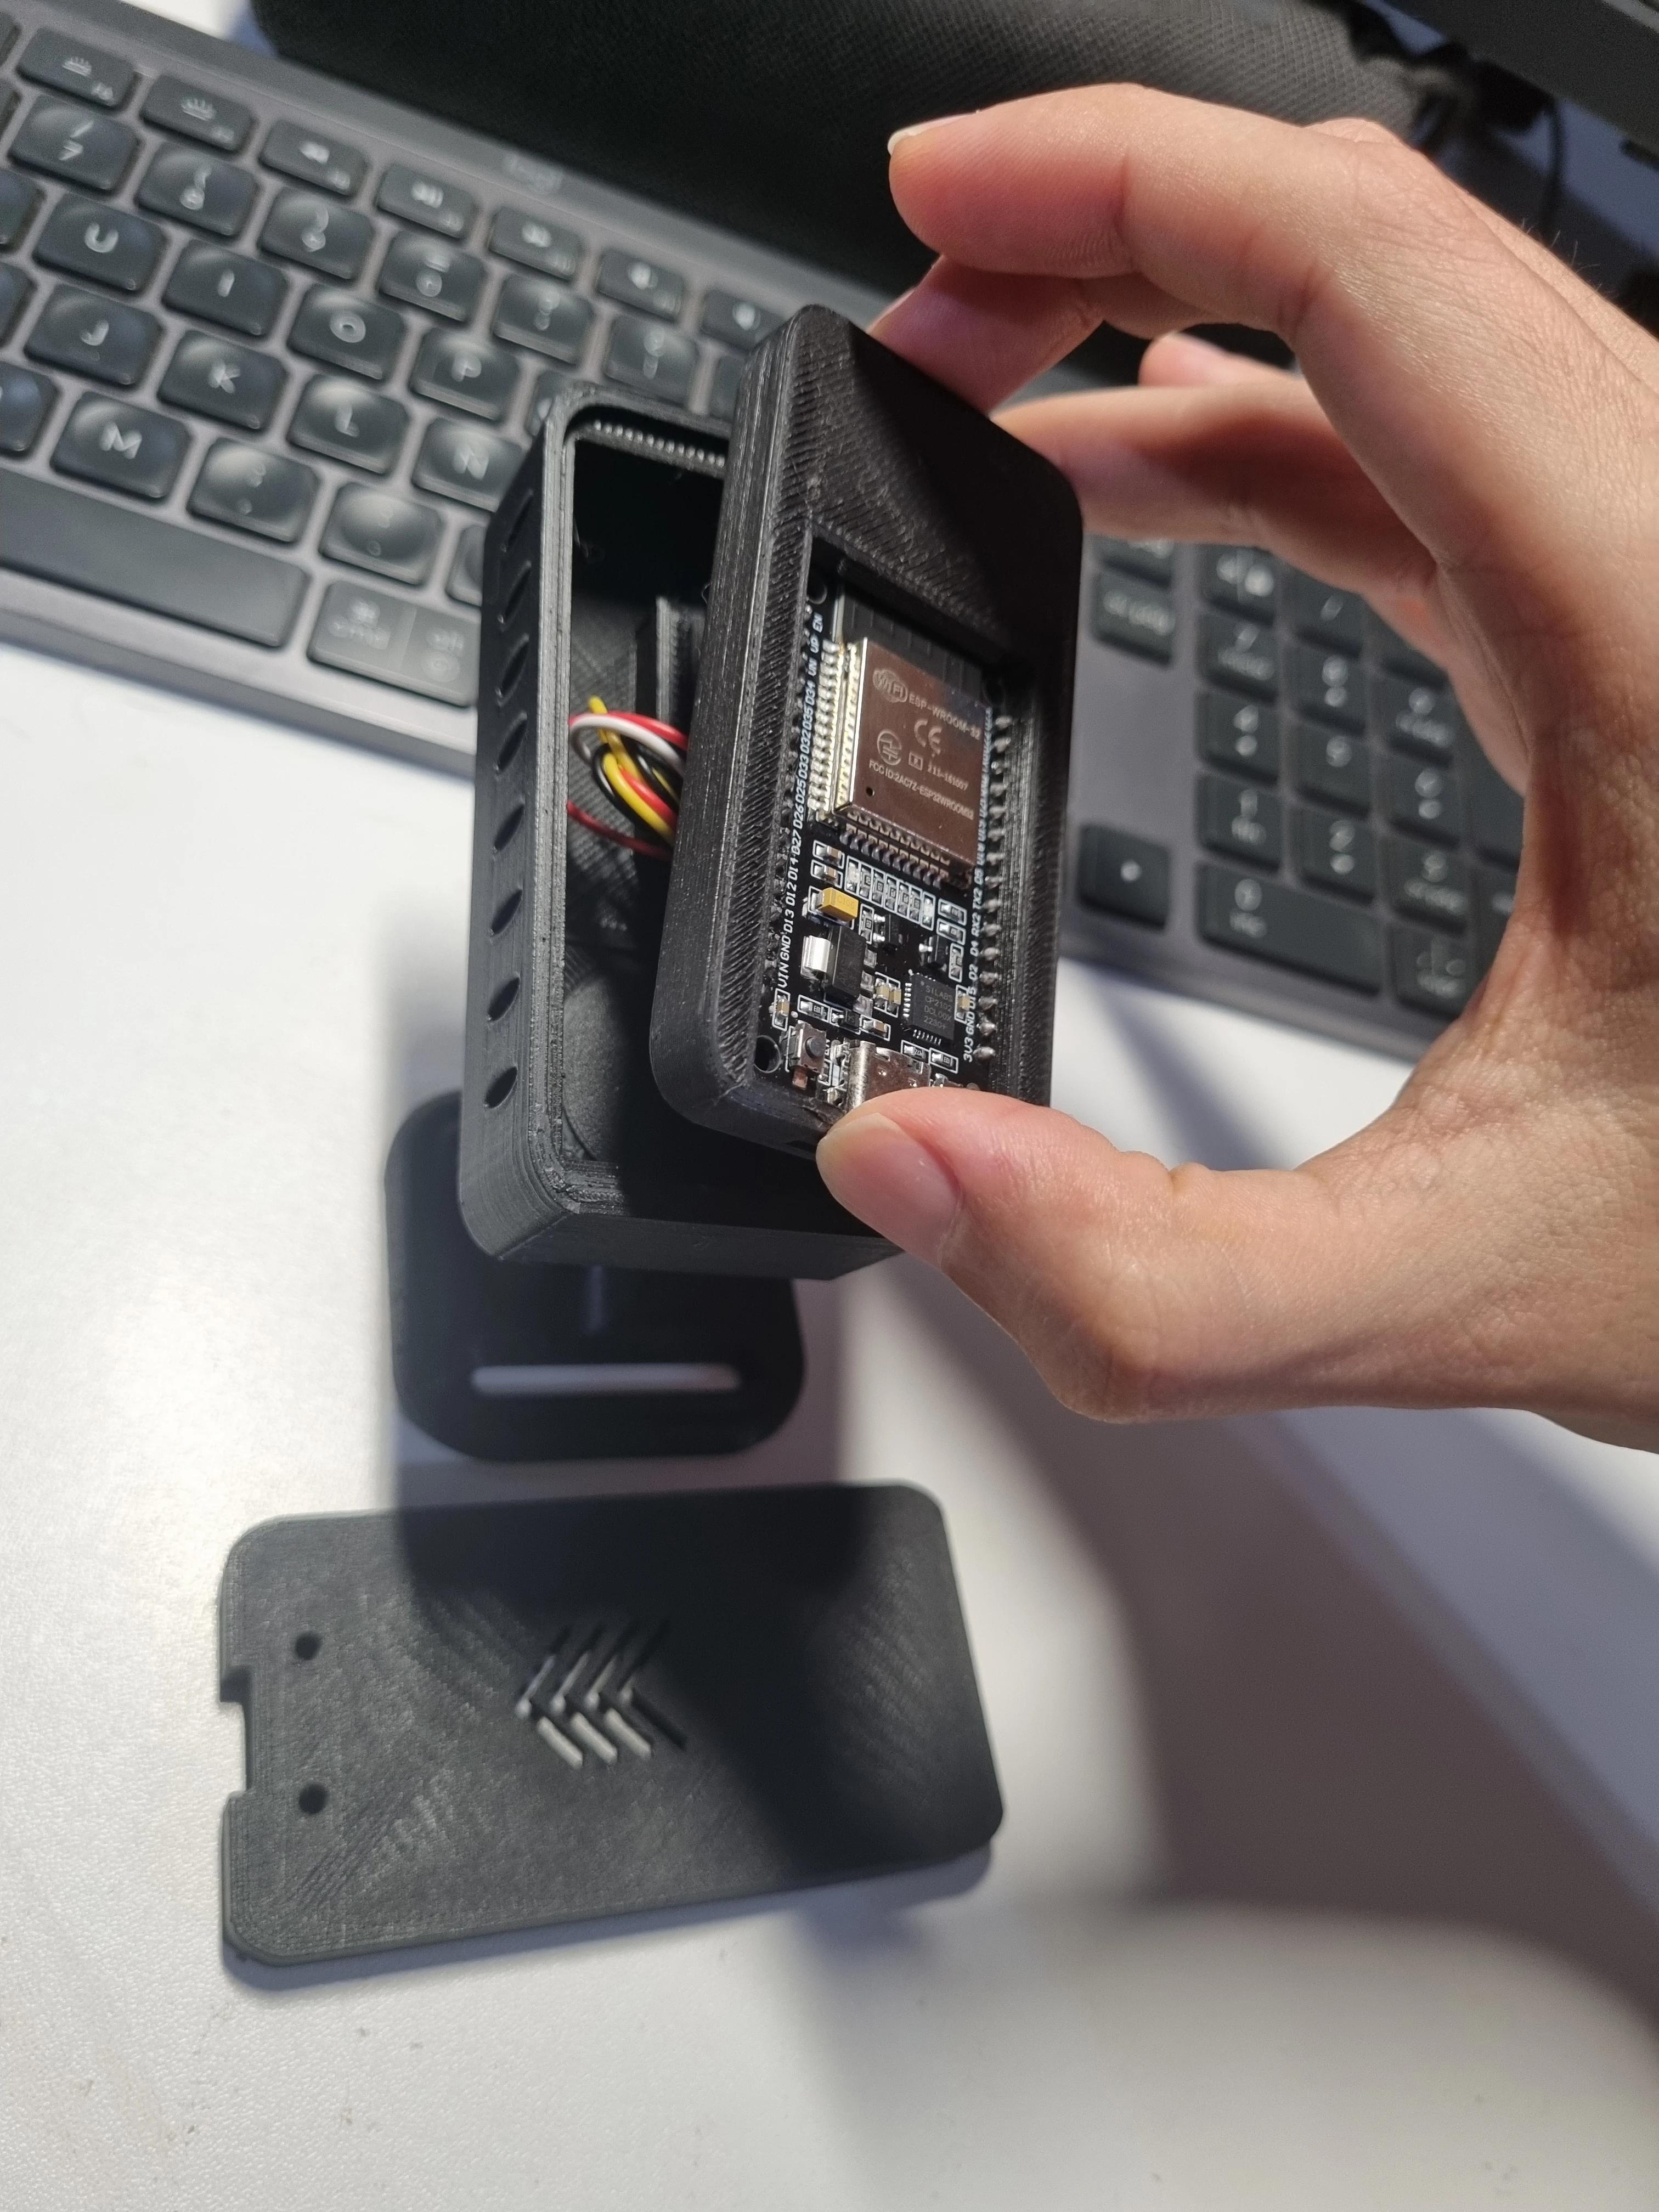
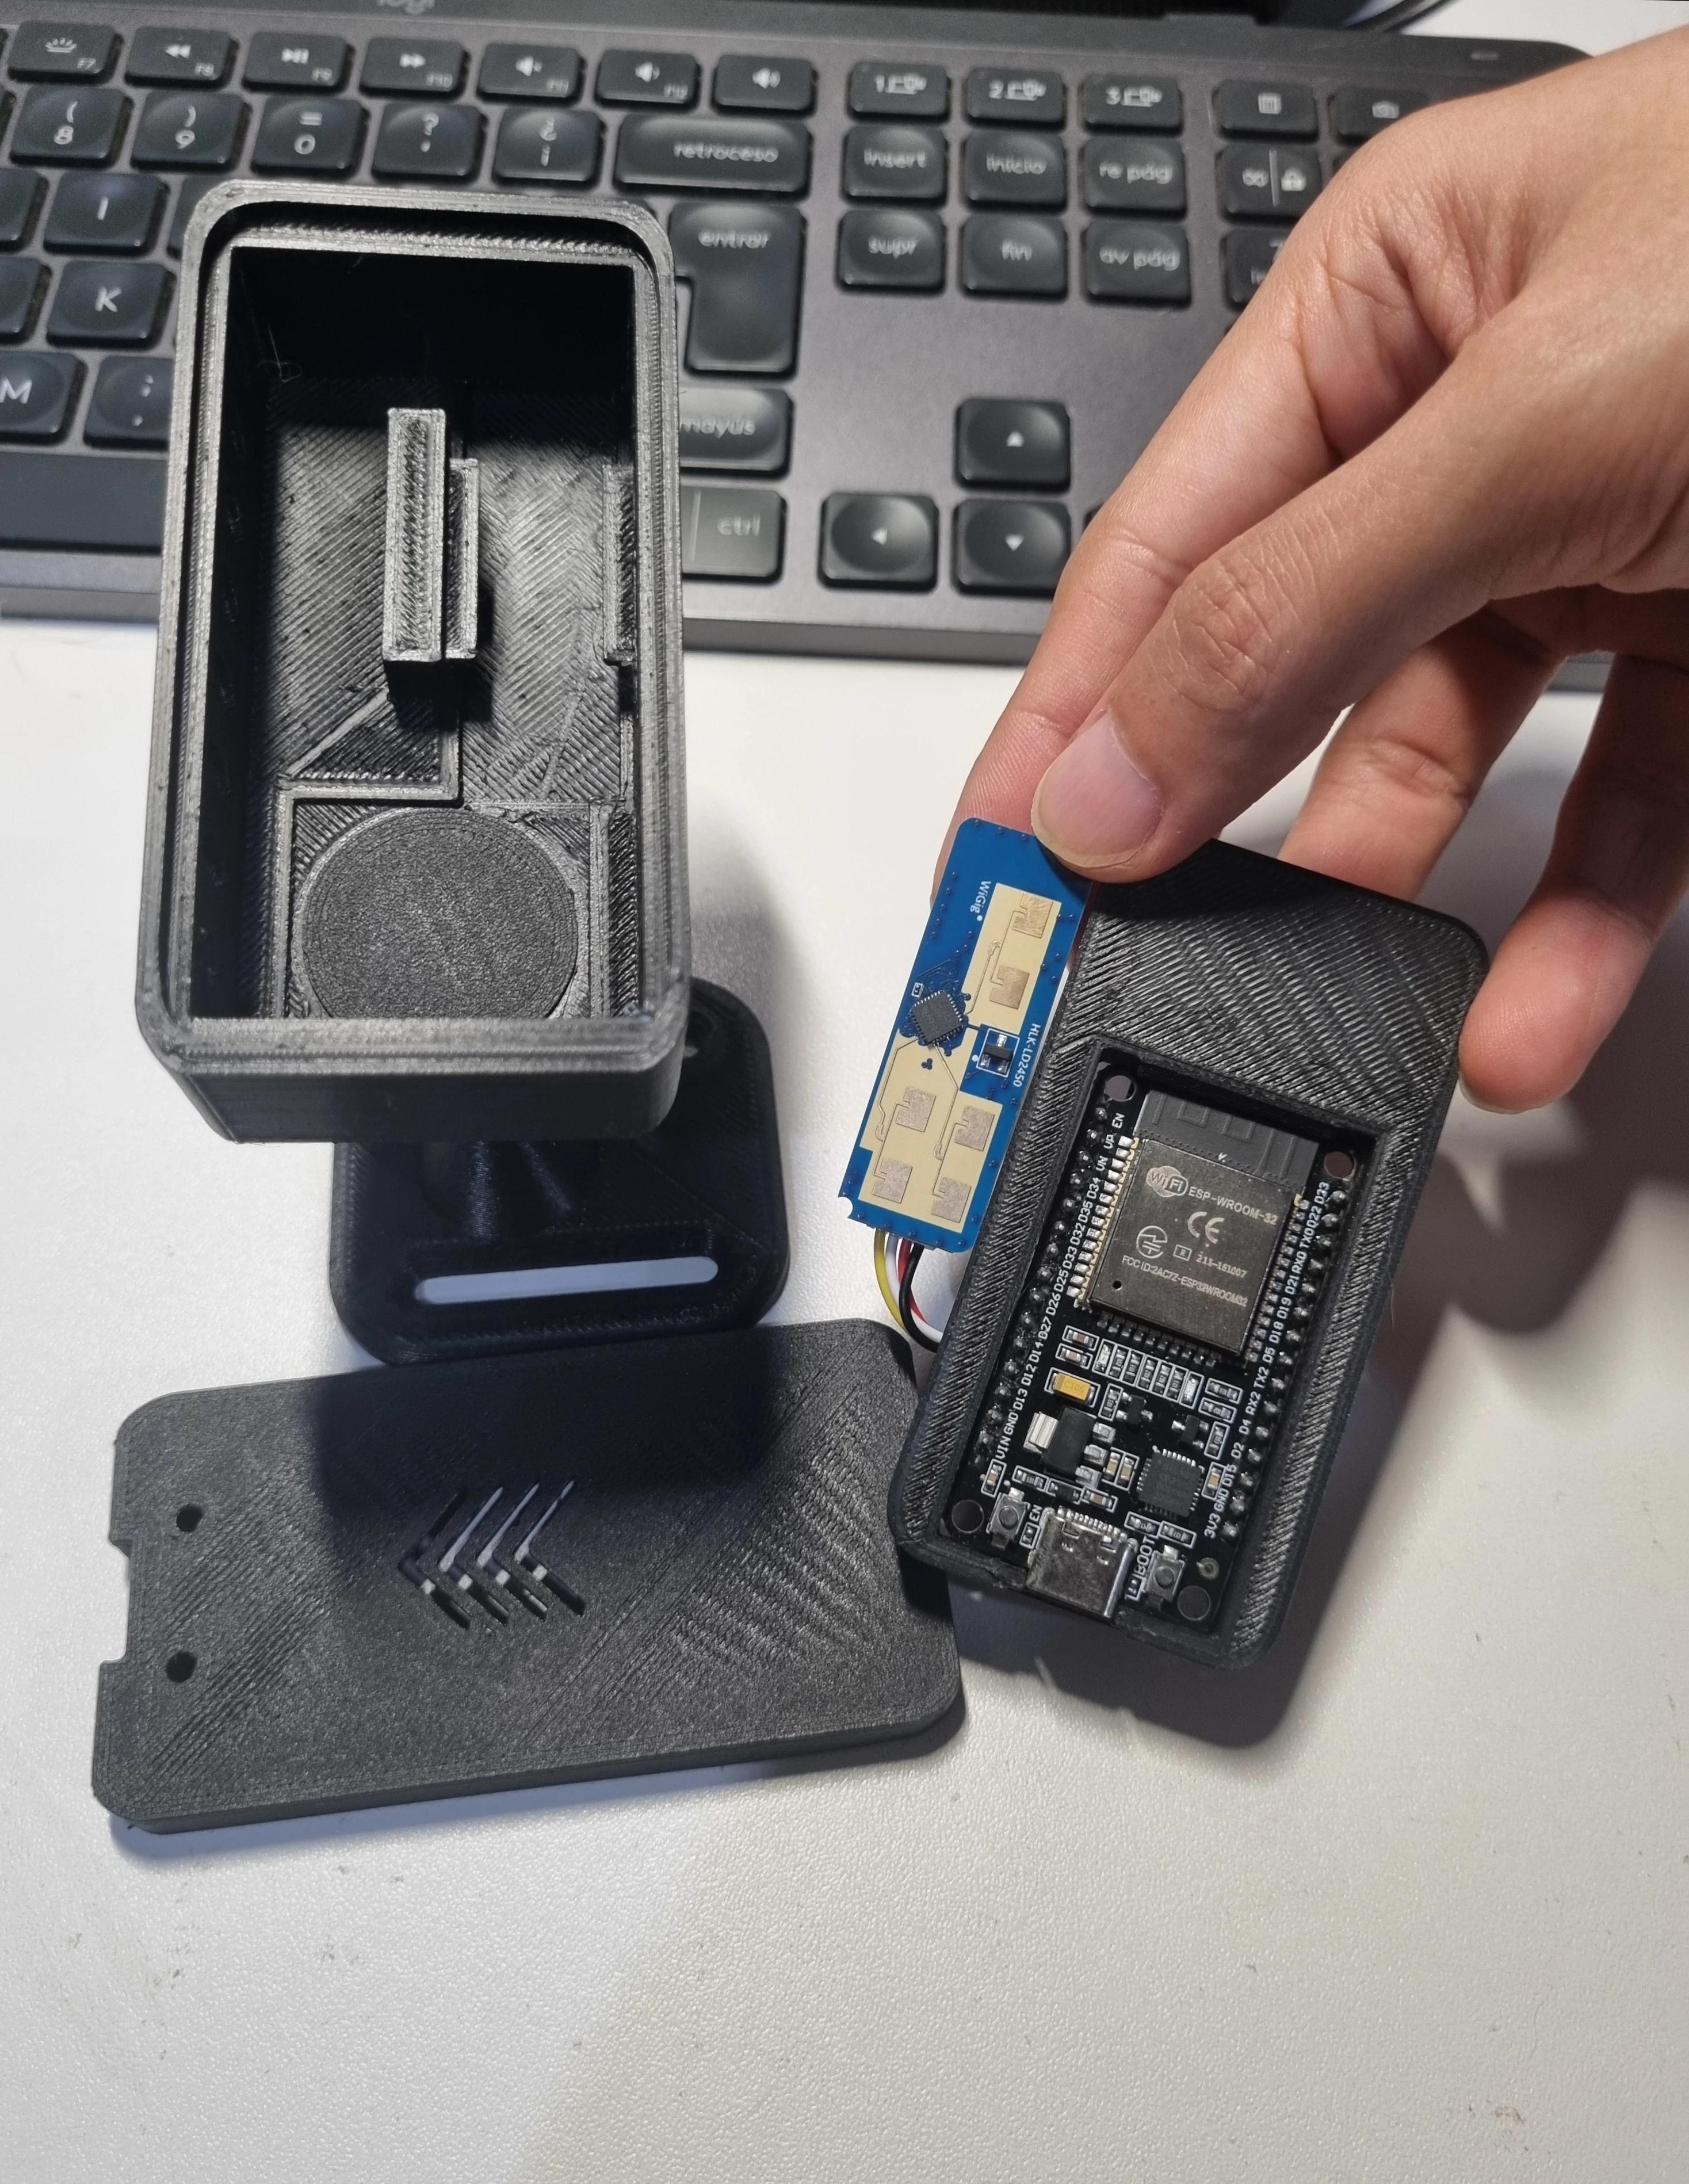
Beginner DIY ESPHome mmWave Presence Sensor
Using the affiliate links below helps support the channel and all the content I create 🎉🙌
- ESP32 30 PIN Development Board
- Amazon: (3 pack)
- Aliexpress: (USB C)
- HLK-LD2450 mmWave Radar Sensor
- Amazon: (HLK-LD2450 Kit)
- Aliexpress: (HLK-LD2450 Kit)
Optional
- Dupont Cable
- USB C Cable
- 5v charger
- Amazon: (2 Pack)
- Aliexpress: (5v charger)
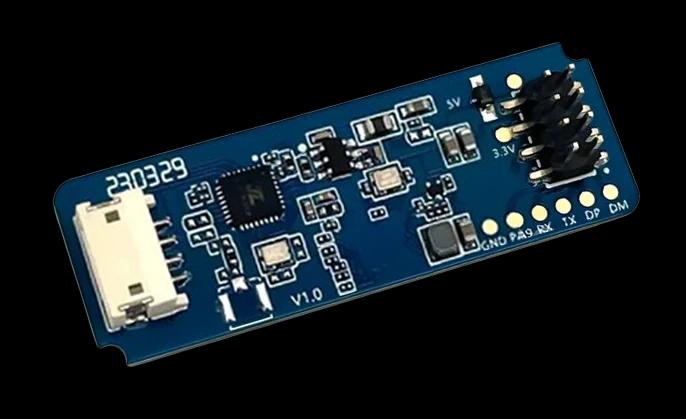
- Frequency: 24 GHz (ISM band)
- Sensor Type: Millimeter wave radar
- Detection Range: Up to 6 meters (approximately 8 meters in practical terms)
- Module Size: Ultra-small, measuring 15mm x 44mm
- Detection Angle: ±60°
- Pitch Angle: ±35°
Additionally, the HLK-LD2450 sensor supports the following features:
- Precise motion target localization and tracking: Distance, angle and speed.
- Configurable Zones: It allows you to define up to 3 configurable zones for monitoring.
- Multiple Connection Options: You can connect it using pin and socket interfaces.
- Intelligent Algorithm Firmware: Utilizes FMCW waveforms and advanced signal processing technology.
I'll keep adding more sensors to this case, so you can use it for other projects as well. 🛠️
You can get it on:
Or order it from:
checkleylane made a clip to held the top of the original case
You can get it on:
F-Square made a new case for this project, with a lots of improvements:
- Rearranged the sensors inside the case (now the case can look up, instead of down).
- Added M3 Screws, so the body can be held in place easily.
You can get it on:
| ESP32 Board | HLK-LD2450 |
|---|
| VIN | 5v |
| TX2 | RX |
| RX2 | TX |
| GND | GND |
Updated firmware to ESPHome 2024.12.4
Added OTA support
Just replace mmwave_sensor with your sensor's name. Ej: mmwave_sensor_aac3 or mmwave_sensor_no_aac3 based on the firmware you flashed.
| Firmware | Sensor Name |
|---|
| With Bluetooth Proxy | mmwave_sensor |
| Without Bluetooth Proxy | mmwave_sensor_no |
type: custom:plotly-graph
title: mmWave Radar Sensor
refresh_interval: 1
hours_to_show: current_day
layout:
  height: 230
  margin:
    l: 50
    r: 20
    t: 20
    b: 40
  showlegend: true
  xaxis:
    dtick: 100
    gridcolor: RGBA(200,200,200,0.15)
💡𐂷 Sensor Light
By
Blacky Documentation
here
zerolinecolor
:
RGBA(200,200,200,0.15)
type: number
fixedrange: true
range:
- 400
- -400
yaxis:
dtick: 100
gridcolor: RGBA(200,200,200,0.15)
zerolinecolor: RGBA(200,200,200,0.15)
scaleanchor: x
scaleratio: 1
fixedrange: true
range:
- 600
- 0
entities:
- entity: ''
name: Target1
marker:
size: 12
line:
shape: spline
width: 5
x:
- $ex hass.states["sensor.mmwave_sensor_target_1_x"].state /-10
'y':
- $ex hass.states["sensor.mmwave_sensor_target_1_y"].state /10
- entity: ''
name: Target2
marker:
size: 12
line:
shape: spline
width: 5
x:
- $ex hass.states["sensor.mmwave_sensor_target_2_x"].state /-10
'y':
- $ex hass.states["sensor.mmwave_sensor_target_2_y"].state /10
- entity: ''
name: Target3
marker:
size: 12
line:
shape: spline
width: 5
x:
- $ex hass.states["sensor.mmwave_sensor_target_3_x"].state /-10
'y':
- $ex hass.states["sensor.mmwave_sensor_target_3_y"].state /10
- entity: ''
name: Zone1
mode: lines
fill: toself
fillcolor: RGBA(20,200,0,0.1)
line:
color: RGBA(20,200,0,0.2)
shape: line
width: 2
x:
- $ex hass.states["number.mmwave_sensor_zone_1_x1"].state /-10
- $ex hass.states["number.mmwave_sensor_zone_1_x1"].state /-10
- $ex hass.states["number.mmwave_sensor_zone_1_x2"].state /-10
- $ex hass.states["number.mmwave_sensor_zone_1_x2"].state /-10
- $ex hass.states["number.mmwave_sensor_zone_1_x1"].state /-10
'y':
- $ex hass.states["number.mmwave_sensor_zone_1_y1"].state /10
- $ex hass.states["number.mmwave_sensor_zone_1_y2"].state /10
- $ex hass.states["number.mmwave_sensor_zone_1_y2"].state /10
- $ex hass.states["number.mmwave_sensor_zone_1_y1"].state /10
- $ex hass.states["number.mmwave_sensor_zone_1_y1"].state /10
- entity: ''
name: Zone2
mode: lines
fill: toself
fillcolor: RGBA(200,0,255,0.1)
line:
color: RGBA(200,0,255,0.2)
shape: line
width: 2
x:
- $ex hass.states["number.mmwave_sensor_zone_2_x1"].state /-10
- $ex hass.states["number.mmwave_sensor_zone_2_x1"].state /-10
- $ex hass.states["number.mmwave_sensor_zone_2_x2"].state /-10
- $ex hass.states["number.mmwave_sensor_zone_2_x2"].state /-10
- $ex hass.states["number.mmwave_sensor_zone_2_x1"].state /-10
'y':
- $ex hass.states["number.mmwave_sensor_zone_2_y1"].state /10
- $ex hass.states["number.mmwave_sensor_zone_2_y2"].state /10
- $ex hass.states["number.mmwave_sensor_zone_2_y2"].state /10
- $ex hass.states["number.mmwave_sensor_zone_2_y1"].state /10
- $ex hass.states["number.mmwave_sensor_zone_2_y1"].state /10
- entity: ''
name: Zone3
mode: lines
fill: toself
fillcolor: RGBA(200,120,55,0.1)
line:
color: RGBA(200,120,55,0.2)
shape: line
width: 2
x:
- $ex hass.states["number.mmwave_sensor_zone_3_x1"].state /-10
- $ex hass.states["number.mmwave_sensor_zone_3_x1"].state /-10
- $ex hass.states["number.mmwave_sensor_zone_3_x2"].state /-10
- $ex hass.states["number.mmwave_sensor_zone_3_x2"].state /-10
- $ex hass.states["number.mmwave_sensor_zone_3_x1"].state /-10
'y':
- $ex hass.states["number.mmwave_sensor_zone_3_y1"].state /10
- $ex hass.states["number.mmwave_sensor_zone_3_y2"].state /10
- $ex hass.states["number.mmwave_sensor_zone_3_y2"].state /10
- $ex hass.states["number.mmwave_sensor_zone_3_y1"].state /10
- $ex hass.states["number.mmwave_sensor_zone_3_y1"].state /10
- entity: ''
name: Coverage
mode: lines
fill: tonexty
fillcolor: rgba(168, 216, 234, 0.15)
line:
shape: line
width: 1
dash: dot
x:
- 0
- $ex 600 * Math.sin((2 * Math.PI)/360 * 60)
- 450
- 400
- 300
- 200
- 100
- 0
- -100
- -200
- -300
- -400
- -450
- $ex -600 * Math.sin((2 * Math.PI)/360 * 60)
- 0
'y':
- 0
- $ex 600 * Math.cos((2 * Math.PI)/360 * 60)
- $ex Math.sqrt( 600**2 - 450**2 )
- $ex Math.sqrt( 600**2 - 400**2 )
- $ex Math.sqrt( 600**2 - 300**2 )
- $ex Math.sqrt( 600**2 - 200**2 )
- $ex Math.sqrt( 600**2 - 100**2 )
- 600
- $ex Math.sqrt( 600**2 - 100**2 )
- $ex Math.sqrt( 600**2 - 200**2 )
- $ex Math.sqrt( 600**2 - 300**2 )
- $ex Math.sqrt( 600**2 - 400**2 )
- $ex Math.sqrt( 600**2 - 450**2 )
- $ex 600 * Math.cos((2 * Math.PI)/360 * 60)
- 0
raw_plotly_config: true
YouTube Subscriber Access
FIRMWARE
YouTube Subscriber Benefit
This firmware is free for all our YouTube subscribers!
Log in with your Google account to access it on our website.
💡 Validation Tip
If you have trouble with this feature, make sure your subscription list is public in your YouTube settings, under "Privacy".